Windows 11 is the latest operating system released by Microsoft and it can be upgraded from Windows 10 online. As the world is make more and more content for social media there are more tutorials and learning videos shared on internet regarding technology. The content sometimes require the screenshot and screen recording from the computer screen. As windows is the most used operating system, this article is to show how to:
- Take screenshot of full screen
- Take screenshot of selected area of screen
- Take screenshot of specific window
- Recording screen
Quick Tip: Pressing ⊞ + ⇧ + S opens snipping bar which allows quick screenshot. Pressing ⊞ + g opens Windows Gaming Bar which has option to capture and record screen. You may need to change game bar settings in order to allow it to take screenshots of desktop and system applications.
Let’s go though some of the basic needed screenshot and recording features on Windows:
Take screenshot of full screen
There are several ways to do that:
A) Taking full screen screenshot and putting in clipboard:
Using button named “prt sc” called print screen on the keyboard can be used to take the full-screen screenshot. Just pression “prt sc” (in some laptops fn/function key need to be pressed simultaneously) will take the screenshot and place it in clipboard. Which can be pasted into any application like paint or MS world.
- Press “prt sc” (or fn + prt sc)
- paste (or ctrl +v ) in some application which allow graphics to be pasted (like Paint):
B)Taking full screen screenshot and saving it as image file:
Many times it is not possible to open any application and paste the screenshot captured in clipboard. In windows one can press ⊞ + Prt Scr which saves the screenshot as file in screenshot folder “C:\Users\<<username>>\Pictures\Screenshots”.
Note: One can edit the location of the screenshot folder by opening the folder Properties > Select Location tab and click Move button. Select appropriate folder and click ‘Apply‘ and ‘Ok‘. ( This isn’t recommended as it is difficult to revert these change in screenshot folder.)
C) Using snipping tool:
In Windows one can use Snipping Tool to take full screen screenshot using following steps:
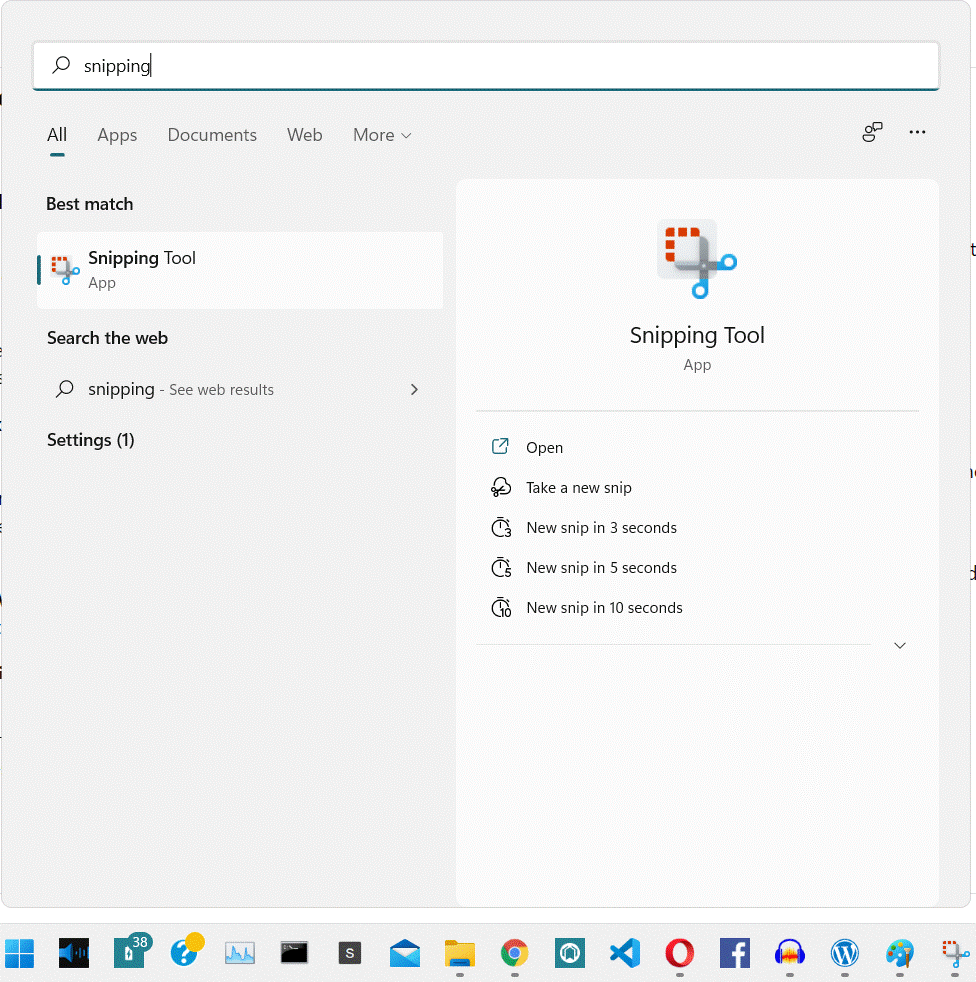
1) Press Windows menu button and search for “Snipping Tool”. Click on Snipping tool application to open it.

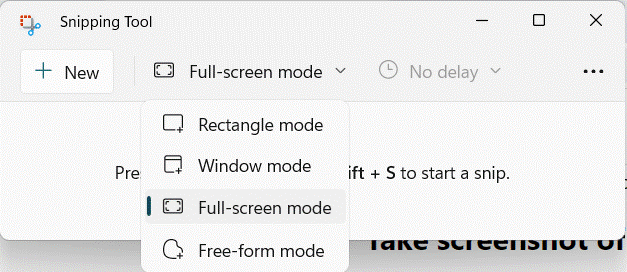
2) Select mode as “Full-screen mode” and click on “+ New” button.

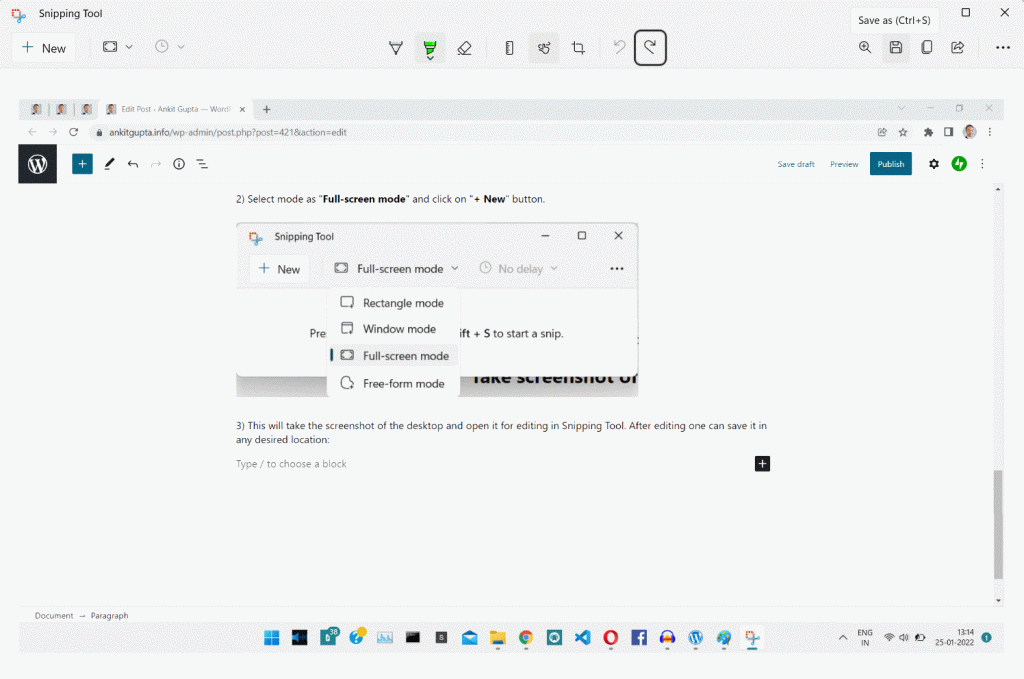
3) This will take the screenshot of the desktop and open it for editing in Snipping Tool. After editing one can save it in any desired location:

D) Using Snipping Toolbar:
In windows we can press ⊞ + ⇧ + S (Windows + Shift + S) button to open Snipping Toolbar:

Click on the “Fullscreen Snip” button (fourth from left) for taking full screen screenshot. This will display the screenshot in lower right corner and also make it available in clipboard. Clicking on it will open it for editing in snipping tool.
E) Using Gaming Bar:
In windows we can press ⊞ + g in order to open the gaming bar:

This by default opens all already opened options but in case nothing is opened already on can click on “Capture” button to open the capture window:

Click on the “Capture” button. The screenshot will get saved in folder “C:\Users\<<username>>\Videos\Captures” which can also be opened by clicking “Show all captures” button and pressing on folder icon.
F) Using Windows Game Bar shortcut ( ⊞ + Alt + Prt Sc ) :
Please press ⊞ + Alt + Prt Sc to perform the “Capture” function as described in above section this will save the screenshot in captures.
Note: You may have to change the setting of Game Bar to allow it to take screenshot of desktop and background in Settings > Capturing.
Taking Screenshot of Selected Area of Screen
One can select some area of the screen while taking screenshot using following methods:
A) Using Snipping Tool:
Please follow following steps to take screenshot of a selected area in snipping tool:
1) Opening Snipping Tool > Select “Rectangle mode” or “Free-form Mode”
2) Select the desired area on screen and save the screenshot.
B) Snipping Toolbar:
Please follow following steps to take screenshot of selected area in snipping toolbar:
1) Please press ⊞ + ⇧ + S (Windows + Shift + S) button to open Snipping Toolbar:

2) Please, click on the “Rectangular Snip” or “Freeform Snip” button for selection area. This will display the screenshot in lower right corner and also make it available in clipboard. Clicking on it will open it for editing in snipping tool.
Taking Screenshot of Specific Window
In order to take screenshot of specific window use following methods:
A) Using Snipping Tool:
Please follow following steps to take screenshot of a selected area in snipping tool:
1) Opening Snipping Tool > Select “Window mode”
2) Select the desired window on screen and save the screenshot.
B) Snipping Toolbar:
Please follow following steps to take screenshot of selected area in snipping toolbar:
1) Please press ⊞ + ⇧ + S (Windows + Shift + S) button to open Snipping Toolbar:

2) Please, click on the “Window Snip” button for selecting window. Click on desired application to take screenshot. This will display the screenshot in lower right corner and also make it available in clipboard. Clicking on it will open it for editing in snipping tool.
Record Screen
One can use Windows Gaming Bar in order to record the screen in windows:
To record screen please follow following steps:
1) Press ⊞ + g and open Windows Gaming Bar.
2) Press “Capture” Button.
3) Click on “Start Recording” button. The button will change into “Stop Recording” button and you will see a small display in right upper corner showing the screen recorder.
4) Stopping the recording will save the video in folder “C:\Users\<<username>>\Videos\Captures”.
Note: One can stop and start recording using shortcut ⊞ + Alt + R and mute/unmute the audio recording using ⊞ + Alt + M . One can modify Game Bar shortcuts in Settings > Shortcuts in order to add new own shortcuts.

